Export function (CSV/Excel)
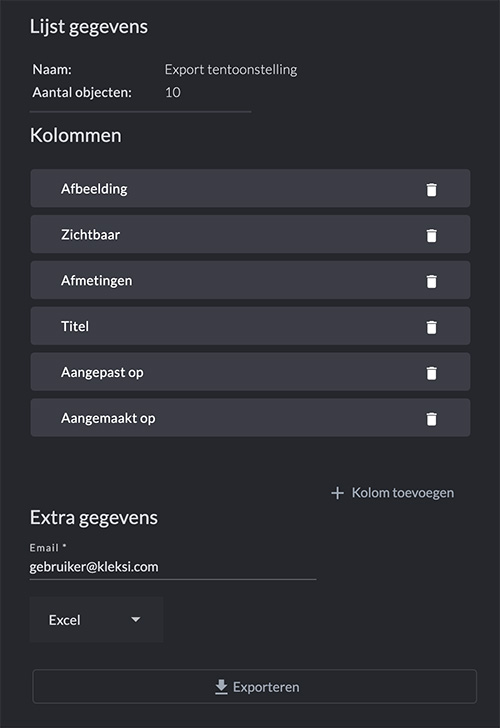
DocsYou can export each list to a CSV or Excel file. Go to the 'Lists' page in the menu on the left. In the overview of all lists you will find 5 buttons behind the name of a list. Click on the 'Export list' button. On the next page you will first see the name of the list you want to export. You will also see how many descriptions or objects have been added to the list.
Setting up columns
You will see the columns that are set for your export. You can determine which columns you want to see in your file and in what order. Add a column by clicking on 'Add column'. You will get an overview of all the fields that are present in your collection. Select 1 or more fields that you want to set as a column. Repeat this step until you have added all the columns you want.
Change order of columns
All columns you selected are listed below each other. Change the order by dragging a column name to the desired position. To do this, click on the 6 dots to the left of the column (field) name, hold and drag it up or down to the desired position. Repeat this step until you have all columns in the desired order.
Choose the file type for your export
You can then indicate whether you want to export a CSV or an Excel file of the list in question. Finally, you must enter an email address to which the list should be sent. The email address you are logged in with is always filled in by default. After the file has been generated, it is automatically sent to the email address in question. So you do not have to wait until the system is ready, you can continue working in the system in the meantime. 
- © Copyright KLEKSI - KLEKSI is a product of Sofco
- Privacy policy
- Cookies
- Developed by Sofco
