Bulk changes
DocsHere you will find a brief explanation of the operation of pages related to editing (multiple) object data on one or more objects at the same time.
Applying a bulk change action is split into 3 steps, selecting the files in question, setting the operation to be applied and checking and initiating the action/operation.
Go to the 'Bulk Changes' page in the menu on the left. At the top you will see three steps that you need to follow.
Step 1. Selection
Using the advanced search function, you can create a list of objects to which you want to apply a change. By setting filters, you will find the objects to which you want to perform the bulk change action.
Step 2. Operation
Then click on “Operation” and select a specific field or multiple fields where you want to perform an action. Behind the name of the chosen field you can select whether you want to replace the contents of the field in question everywhere or search for a specific word or number and replace it with the new value. Each adjustment is added to a list of all desired changes at the bottom of the page. When you are ready you can click on the “check” button and go to step 3, the overview of all planned changes.
Step 3. Check / overview
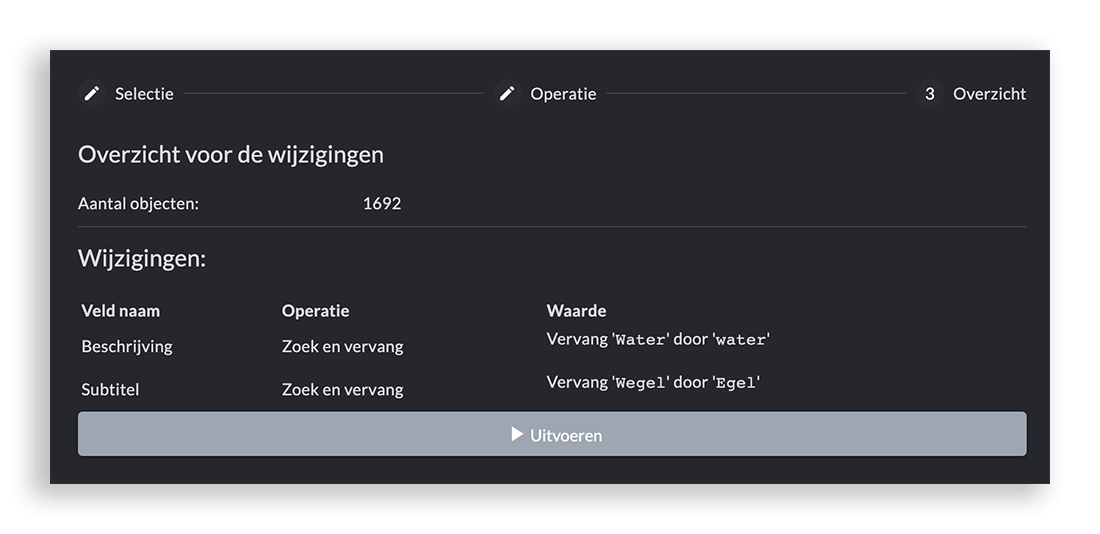
The overview shows the number of descriptions or objects to which the bulk change action will be applied for checking purposes. Below that, you can see which fields it will be applied to, what type of change will be applied to these fields (replace or find and replace) and which values will be replaced. If you are sure that everything is set up correctly, you can perform the bulk change.
Undo a bulk change
Making an incorrect bulk edit can have major consequences for your collection(s). If you make mistakes, you can undo them. The 'Bulk Edit History' page shows which sessions performed a bulk edit. The 'Undo' button allows you to revert the bulk edit to its previous status.
- © Copyright KLEKSI - KLEKSI is a product of Sofco
- Privacy policy
- Cookies
- Developed by Sofco
