

Frontend for visitors
DocsKLEKSI features a powerful frontend that allows visitors to search, view, and discover your collection online. The frontend is linked to your KLEKSI environment and installed on your own domain name or website.
As a result, visitors remain within your organization's branding and environment, while all collection data is managed centrally from KLEKSI. 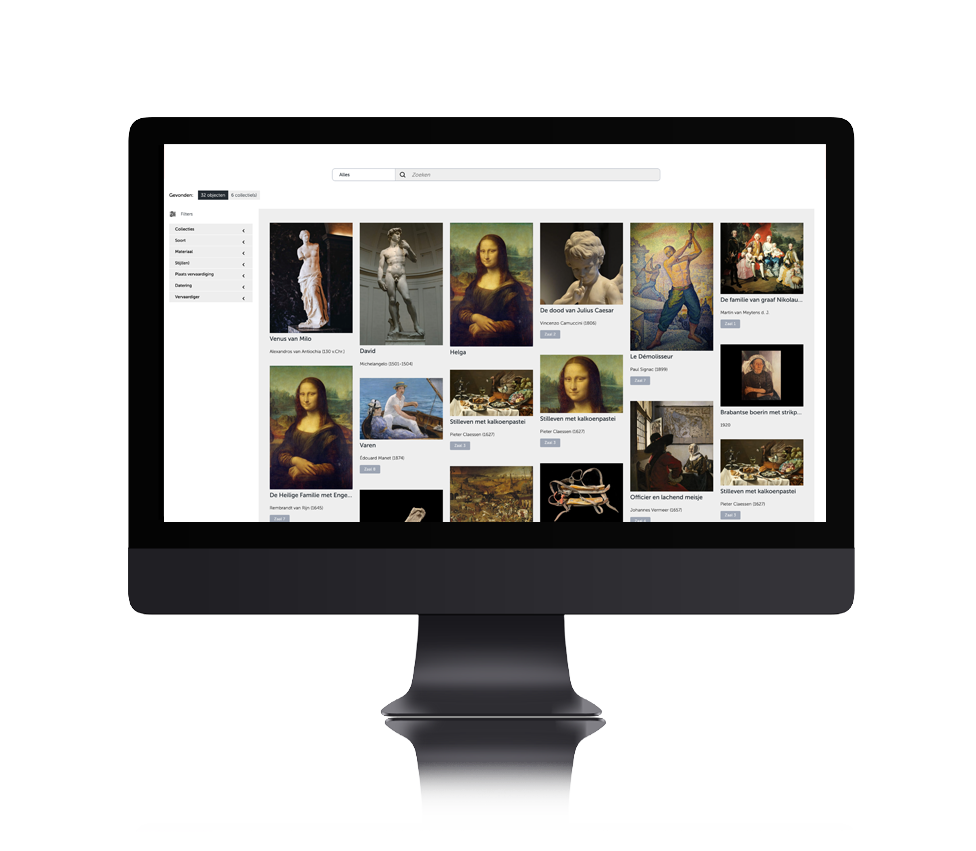
Overview page
The overview page offers visitors a visual introduction to the collection.
For example, the following can be shown here:
- objects
- Collections
- Themes
- Exhibitions
- Stories and context information
This page serves as the public gateway to the collection.
Search and results page
The KLEKSI frontend is the audience-oriented search and presentation function that can be placed on your website. This allows visitors to consult your collection online. Depending on the available collection data, visitors can, among other things:
- search within the collection
- filter the search results
- view and enlarge images
- play videos
- listen to audio clips
- View, browse, and search PDF documents.
Determine which information is published
Via the KLEKSI dashboard, you determine which information from your registration becomes visible to visitors. To do this, you can set a public role. Within this role, you determine which elements and associated registration data may be displayed via the frontend. Additionally, through the role, you determine which collections you want to make available via the frontend. Data that does not fall within the configured public role or the selected collections will not be shown to visitors.
Object page
The object page displays all available information about an object.
Depending on the configuration, an object page may contain, among other things:
- Title
- Description
- Images
- Audio clips
- Videos
- 3D models
- Documents
- Relationships with other objects
- Linked thesaurus terms
- Linked Open Data references
The content of the object page is fully managed from the KLEKSI dashboard.
Search function with Elasticsearch
The search functionality of the KLEKSI frontend is based on Elasticsearch. Elasticsearch is a powerful search technology specifically developed for quickly searching large amounts of data. Instead of searching directly within text, Elasticsearch uses an optimized search index. As a result, search results can be found within milliseconds, even with very large collections.
Advantages of Elasticsearch
Visitors benefit from:
- Lightning-fast search results
- Search suggestions while typing
- Full text search queries
- Support for multiple languages
- Flexible search options
- High scalability
This ensures the search experience remains fast and user-friendly, even with collections of hundreds of thousands or even millions of objects.
Advanced zoom function
KLEKSI supports publishing images in very high resolutions.
This allows visitors to zoom in on images to a detailed level, for example to:
- Brushstrokes to view
- to investigate material structures
- To study details of objects
- Inscriptions or markings to be read
The zoom function uses the same technology as online map services such as Google Maps.
How does this work?
When a visitor zooms in, the entire image is not loaded. Instead, KLEKSI automatically divides the image into small tiles that are loaded only when needed.
As a result:
- Loading times remain short.
- Less data traffic is used.
- Can very large images be viewed smoothly?
- Significantly improves the user experience.
Set filter options
Via the dashboard, you also determine which data visitors can filter the collection by. For text fields and list box fields, you will find the 'Set as filter' option for this purpose. When you activate this option, the relevant field is offered as a filter option in the frontend. For example, if you set the 'Maker' field as a filter, visitors can filter by the makers that appear within the collection you are publishing. The available filter values are not displayed alphabetically by default, but are arranged based on the number of objects they relate to. Consequently, a maker that appears for many objects is displayed higher in the list than a maker that appears for only a few objects. This order was deliberately chosen based on UX considerations. As a result, the filter values likely to be most relevant to visitors are shown first. This makes it easier to quickly navigate to common makers, subjects, or other attributes within the collection.
Examples of filters are:
- Manufacturer
- Material
- Technology
- Dating
- Collection
- Location
- Object type
Setting a field as a filter
To make a field available as a filter:
- Go to Object types.
- Click Edit Structure next to the desired object type.
- Open the element containing the relevant field.
- Click on the field.
- Select Edit Field.
- Enable the Set as filter option.
- Save the change.
The field then becomes available as a filter within the frontend.
Manage filter order
The order in which filters are displayed can be adjusted.
- Go to Settings.
- Open the Filter Order section.
- Drag a filter to the desired position.
- Click Save Filters.
The new order is applied immediately to the frontend.
Smart sorting of filter values
Filter values are automatically sorted based on the number of linked objects.
The most frequently occurring values are displayed at the top.
This has several advantages:
- Visitors find relevant options faster.
- Scroll through long lists less.
- Better user experience.
- Higher search efficiency.
As a result, the most frequently used filter values automatically become the most visible.
Supported filter types
Not every field type can be used as a filter.
Currently, KLEKSI supports, among others:
- Text fields
- Selection lists
These field types are best suited for fast and reliable filtering within large collections.
Secured and protected content
When using roles and permissions, parts of the frontend can be hidden.
This allows you to, for example:
- Show exclusive collections to members.
- Restrict research information to researchers.
- Make high-resolution files available only to authorized users.
- Shield non-public objects.
The visibility of collections, objects, media, and supplementary information is fully managed from KLEKSI. 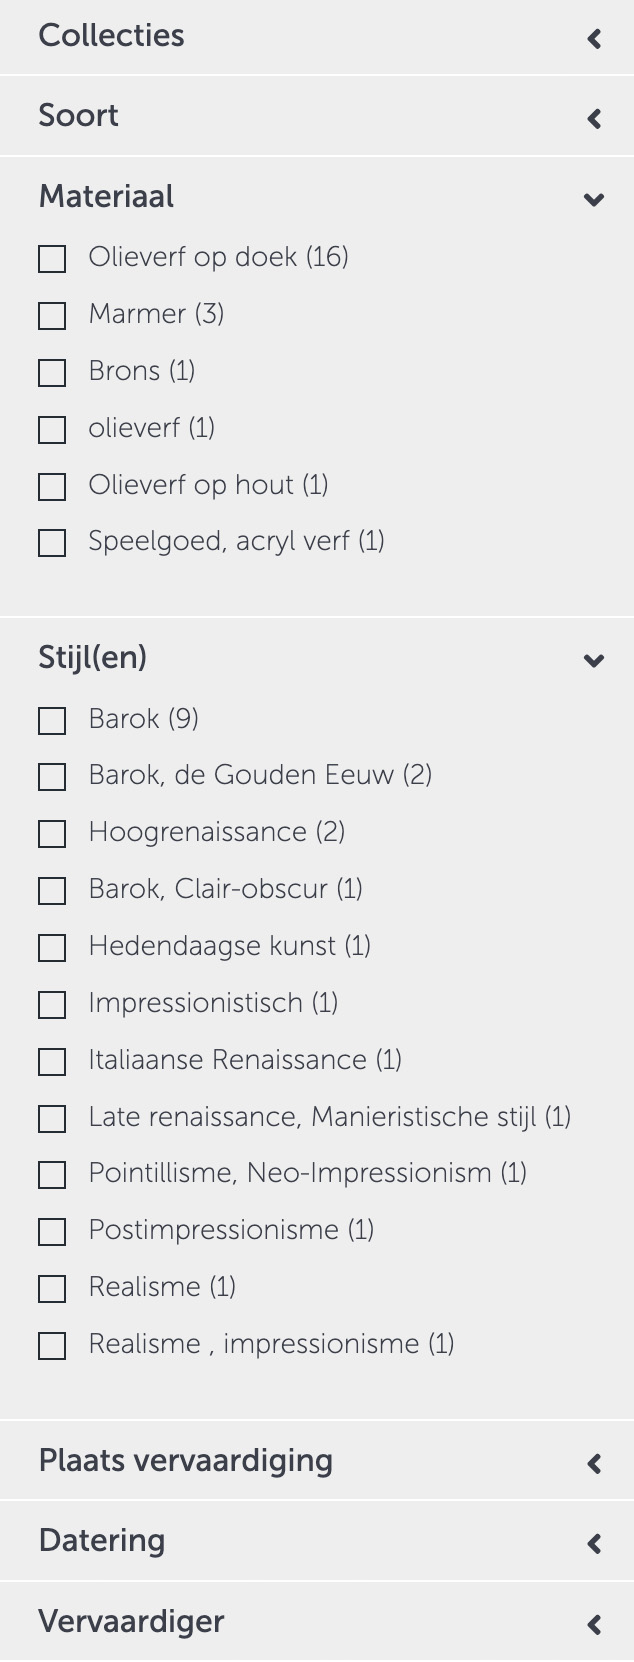
Text to speech
To make collections more accessible, KLEKSI supports automatic text-to-speech functionality.
The title, subtitle, and description of an object can be read aloud automatically.
This provides additional support for:
- People with dyslexia
- People with a visual impairment
- Visitors who prefer listening to reading
- Educational applications
The functionality contributes to improved accessibility and helps organizations comply with modern accessibility guidelines. 
Important
The frontend of KLEKSI is directly linked to your collection data. As a result, changes you make in KLEKSI can be automatically published on your website.
Through the combination of powerful search technology, advanced filters, high-resolution media display, access control, and Linked Open Data support, KLEKSI offers a future-proof solution for the online presentation of heritage collections, archives, libraries, and museum objects.
- © Copyright KLEKSI - KLEKSI is a product of Sofco
- Privacy policy
- Cookies
- Developed by Sofco